How to Create LINE Stickers with Ibis Paint & CLIP STUDIO
A technical guide for artists on handling safety margins, resolutions, and batch processing to avoid common rejection mistakes.
Table of Contents
Introduction
"Drawing illustrations is fun, but the submission process is difficult..."
"I thought I got the size right, but it got rejected for the 10px margin rule (cry)."
"I saved it as a transparent PNG, but the background looks weird!"
Have you ever felt this way?
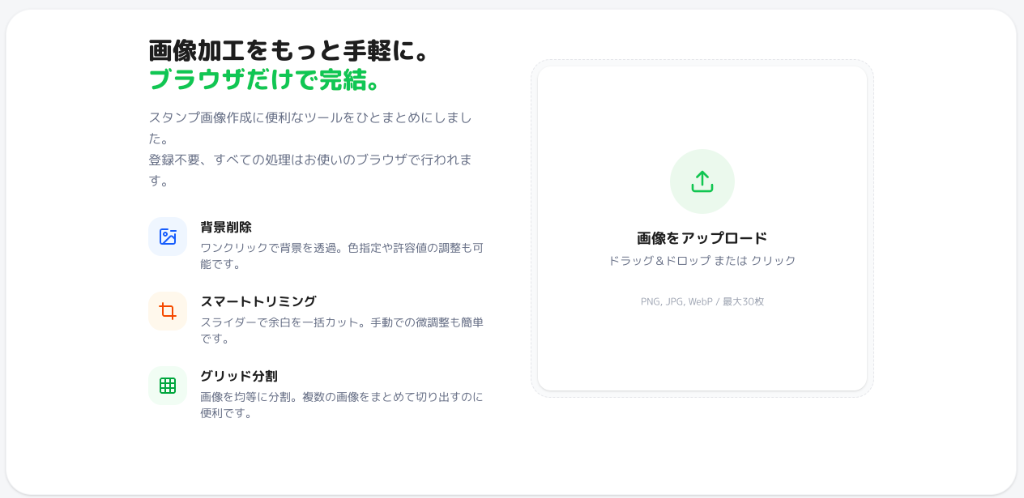
In this article, we'll show you how to easily bypass these frustrating points using "EzStampify" so you can focus on creating!
The Most Common Causes for Rejection
While the review process is faster now, rejections due to "format issues" are still common. Here are two mistakes beginners often make.
① Misunderstanding the '10px Margin Rule' LINE's guidelines recommend leaving 'about a 10px margin.' Drawing right up to the edges of the 370x320px canvas might lead to rejection or a cramped look on smartphone screens.
Turn on the 'Auto Padding' setting in EzStampify. Our AI detects the outline and automatically creates the perfect 10px margin for you.
② 'Transparency Leaks' and Invisible 'Dust' If you forget to paint the whites of eyes and leave them transparent, they will blend into Dark Mode backgrounds. Also, tiny leftover pixels can throw off the balance of the whole sticker.
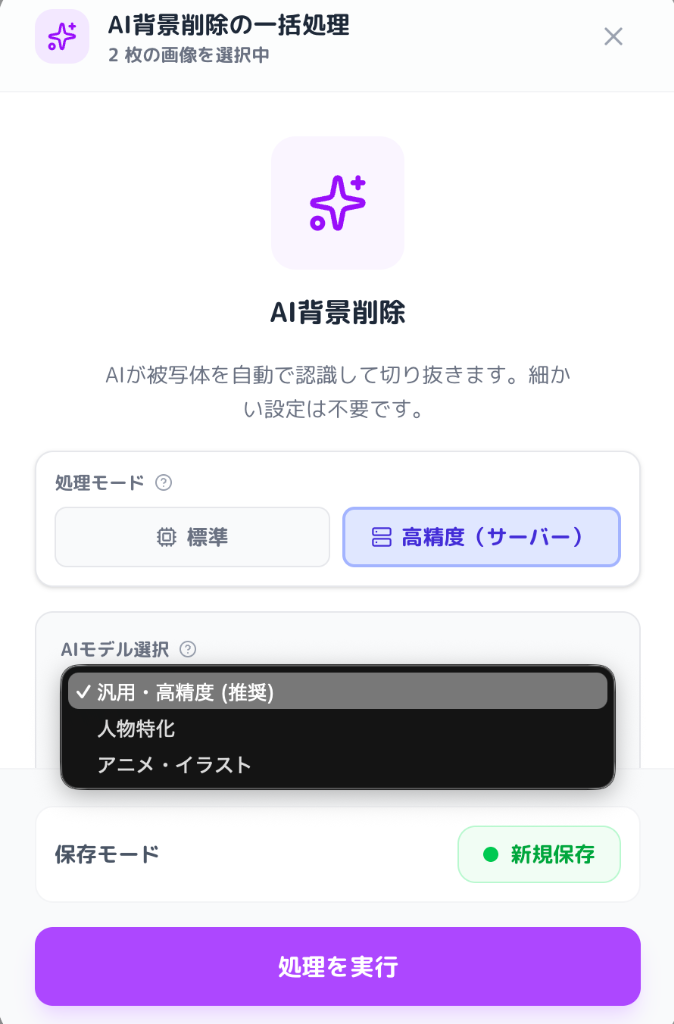
Use the 'Background Removal (AI)' feature to cleanly process edges and wipe away any microscopic leftover pixels.
Recommended App Settings for Best Results
Since EzStampify handles the resizing later, you have more freedom while drawing.
For ibis Paint Users
- Draw Big: Drawing at 2x size (740x640px) makes fine details easier and lines look sharper when scaled down.
- Saving: Always select 'Save as Transparent PNG' when exporting from the gallery.
- Layer Tip: Fill the background layer with opaque white while coloring to spot unpainted areas easily. Remember to hide it before saving!
For CLIP STUDIO PAINT Users
- Vector Layers: Drawing lineart on a vector layer ensures quality won't degrade if you change sizes later.
- Hide Paper Layer: Hide the 'Paper' layer at the bottom of the palette to ensure your background is truly transparent.
- Exporting: Set the expression color to 'RGBA (Color)' when exporting as .png.
Automating the Finish with EzStampify
Let's automate the tedious administrative work so you can stay focused on your creativity!
Batch Processing & Management
Drag and drop up to 40 images into EzStampify. Mismatched canvas sizes are not a problem.
Use the 'Gallery Management' after uploading to filter or apply specific tools to selected batches.
Automatic Resizing & 10px Padding
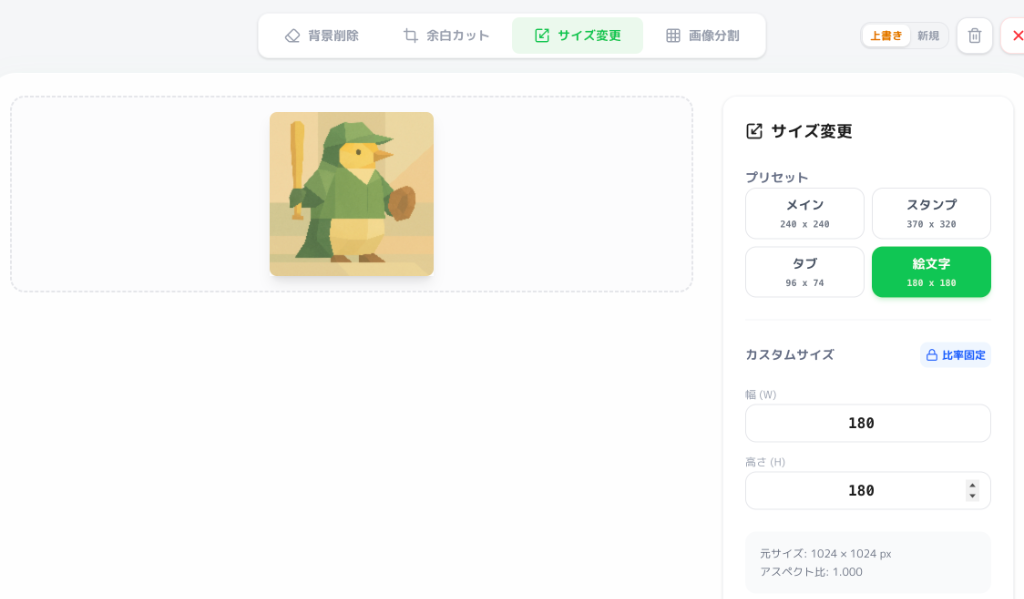
Select the 'Sticker (370x320)' preset. The tool will automatically scale your art down and add the required 10px margins to every file.
Generating Main & Tab Images
Choose your favorite piece and select 'Main' or 'Tab' in the resize settings to generate the required sizes instantly.
Fixing Transparency with AI
If you forgot to transparentize, use the 'AI Background Removal' button to fix it directly in your browser.
Advanced Features: Image Splitting & APNG
① Image Splitting Automatically extract multiple character expressions from a single large canvas into individual files.
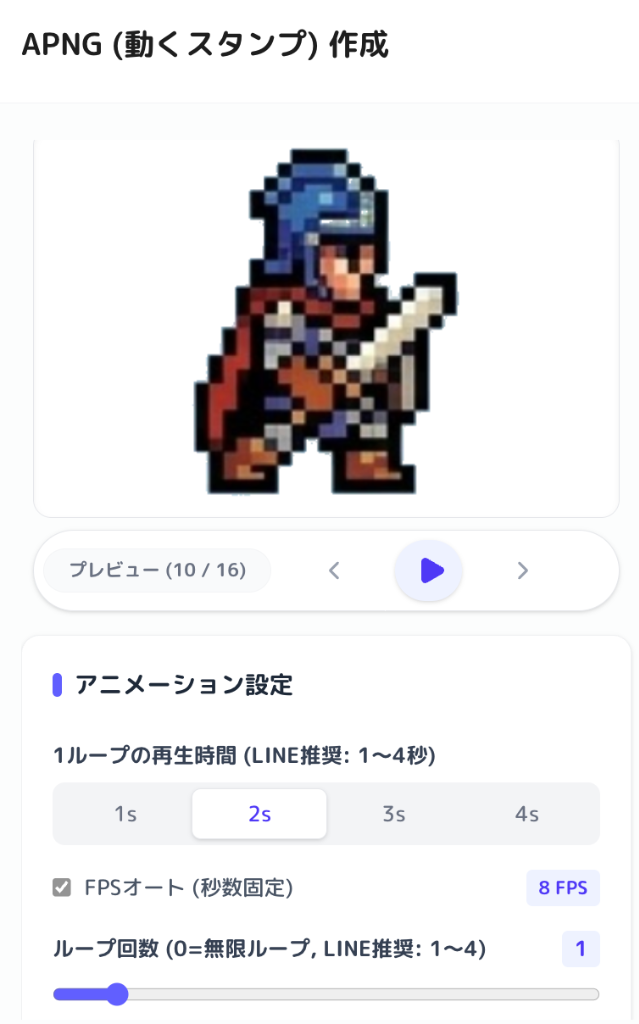
② Converting to Animated Stickers (APNG) Combine frame-by-frame images into an 'Animated Sticker (APNG)' format with simple speed controls.
The Final Checklist
- [ ] Paint Check: Are the 'white' parts of your character actually painted white?
- [ ] Count Check: Do you have exactly 8, 16, 24, 32, or 40 images?
- [ ] Readability Check: Is your text legible on small screens? (Check the preview in EzStampify!)
- [ ] Main & Tab Images: Do you have the two extra resized images ready?
Wrapping Up
Leave the tedious finishing work to EzStampify, and use the time you save to brainstorm ideas for your next sticker set. We're rooting for you!