How to Create Animated Stickers (APNG)
Learn how to use EzStampify's built-in APNG tool to create platform-compliant animated stickers from your images.
Table of Contents
Prepare Your Frames (Preprocessing)
Prepare the source images for your animation. By combining EzStampify's features, you can easily create a sequence from a single image.
1. Create Assets: Use AI like Gemini to generate a 'sprite sheet' showing character movements.
2. AI Background Removal: After uploading, use the AI Removal tool to transparentize the entire sheet.
3. Batch Splitting: Use the Split tool to cut the sheet into individual frames for your animation.
* For detailed instructions on each tool, see the How to Use page.
Select Images in Gallery
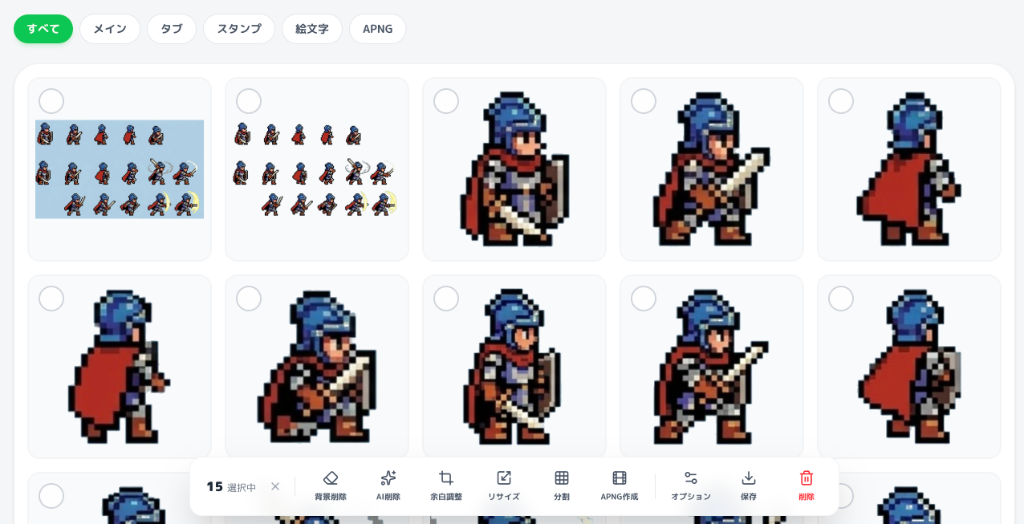
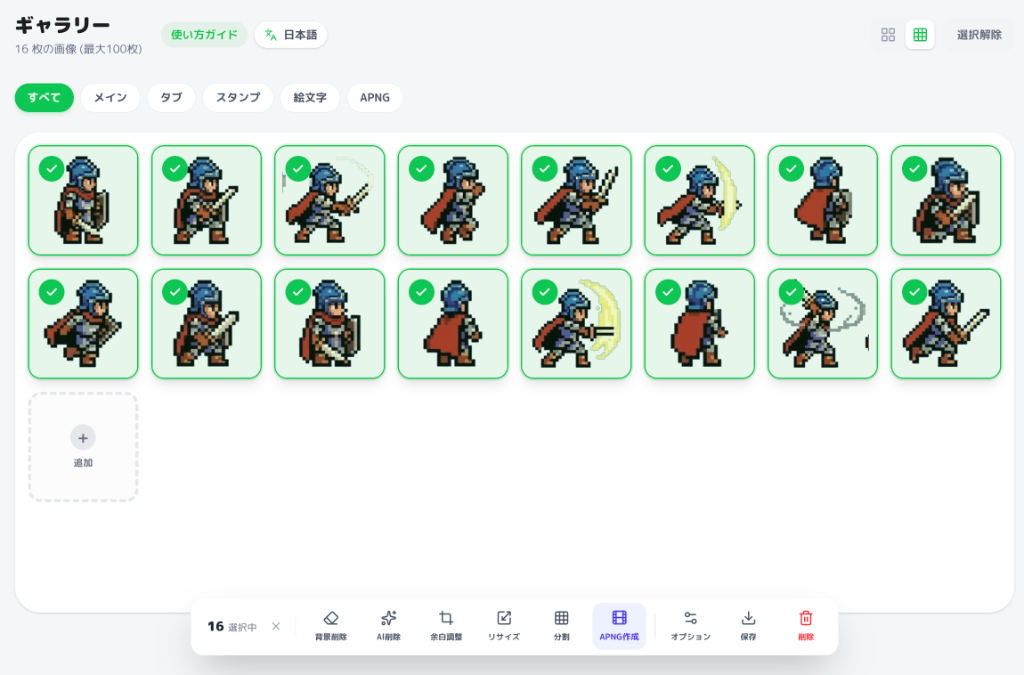
In the gallery, select the images you want to use for your animation.
After selecting them, click the 'Create APNG' button that appears in the bottom toolbar (you can adjust the order in the next step).
Animation Settings
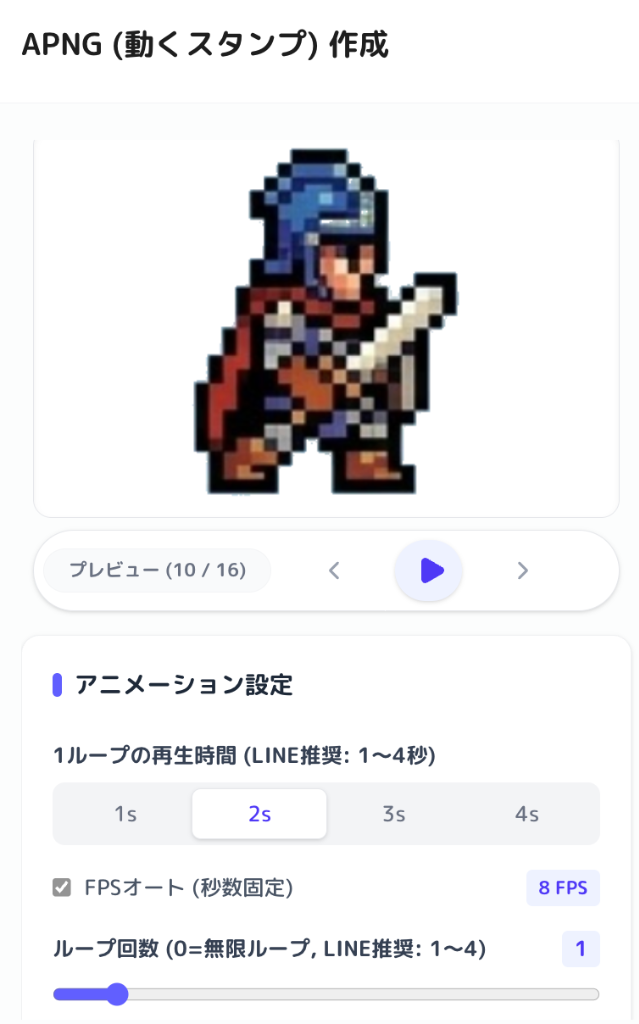
The APNG creation modal will appear. Adjust the following settings and check the preview:
• Playback Time: Choose between 1s, 2s, 3s, or 4s. LINE stickers must be within 4 seconds.
• Loop Count: Set the number of loops. For LINE, this should be 4 or fewer (0 means infinite loop).
Click 'Create APNG' to combine your images into a single animated file, which will be added back to your gallery.
Frame Management (Reorder & Exclude)
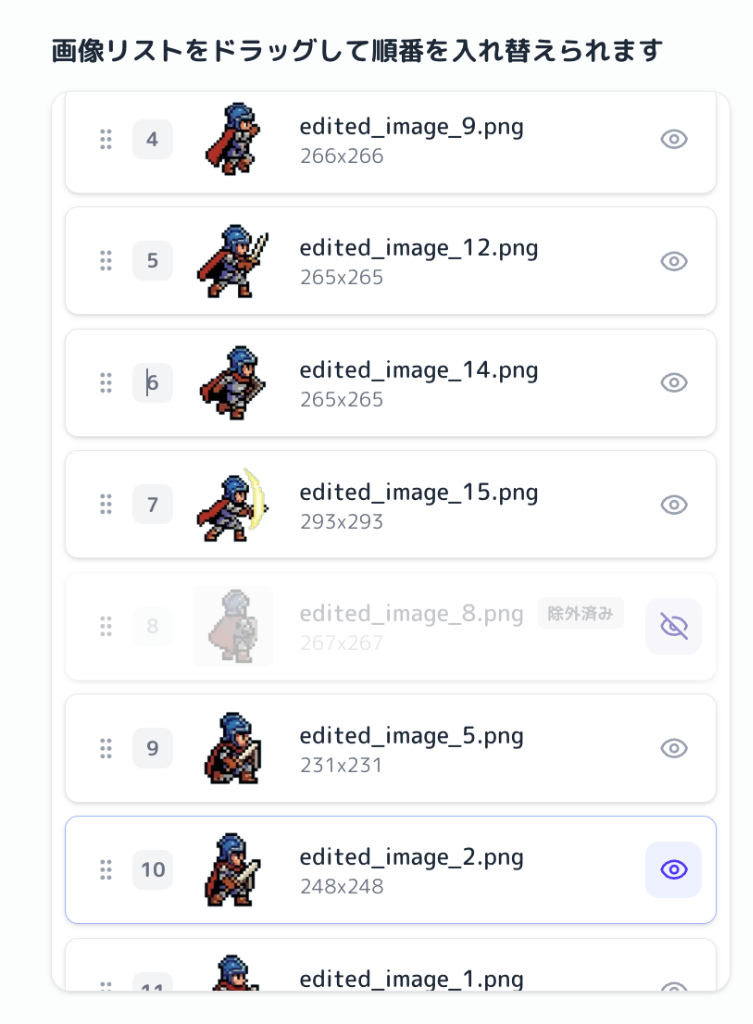
You can manage individual frames within the creation modal's frame list:
• Reorder: Drag and drop the handles on the left to change the animation sequence.
• Exclude (Toggle): Click the 'eye' icon on the right to temporarily exclude a frame from the animation. This is useful for fine-tuning the movement without permanently deleting frames.
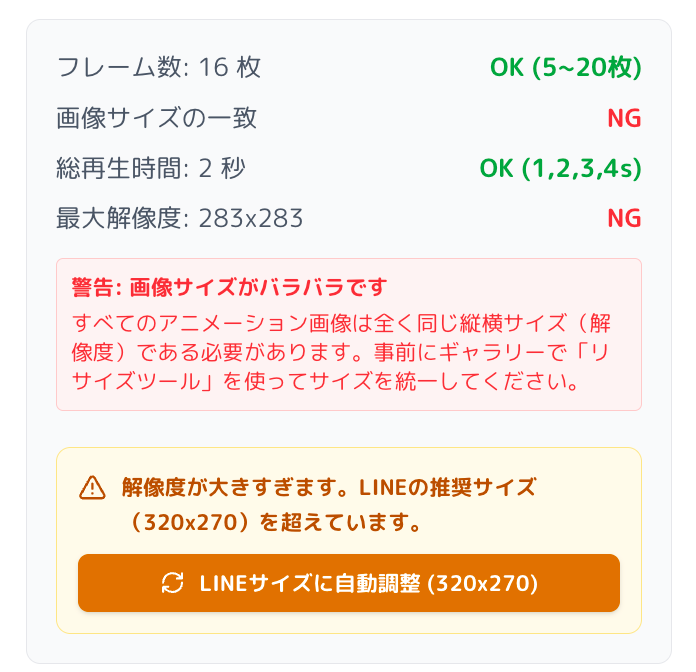
Guideline Check & Auto-Resize
LINE animated stickers have strict rules regarding frame count (5–20), duration, and dimensions.
EzStampify monitors these requirements in real-time within the modal:
• Inconsistent Sizes: If frames have different dimensions, an error will appear. Use the Resize tool in the gallery to unify them first.
• Resolution Too Large: If the resolution exceeds 320x270, an 'Auto-Resize to LINE (320x270)' button will appear. Clicking this will batch-resize your frames to fit the requirements automatically.
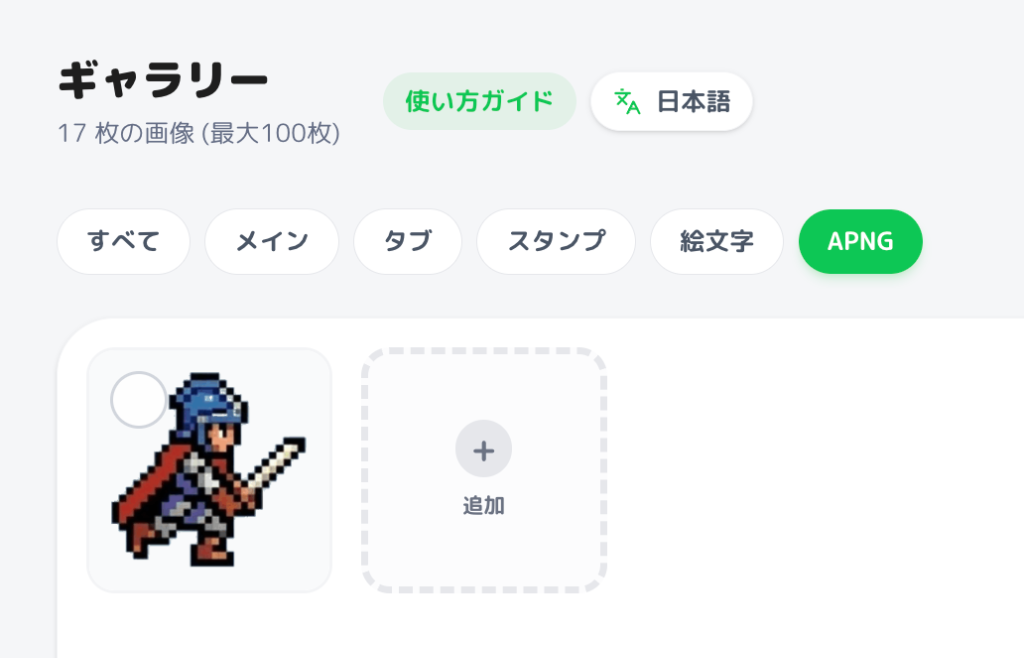
Filter by APNG
Your newly created APNG files are automatically added to the gallery.
Tap the 'APNG' filter at the top of the gallery to quickly isolate and find your animated stickers.
Production Tips & Precautions
To pass the LINE review process smoothly, please keep the following points in mind:
• The Importance of the First Frame: The first frame serves as the static image shown in the chat list. Choose the highest quality frame that best represents the sticker's concept.
• Strict Duration Rules: LINE requires exactly 1, 2, 3, or 4 seconds for the total duration. Always double-check EzStampify's automatic calculation.
• No Intense Flashing: Animations with rapid strobe effects or high-contrast flickering are strictly prohibited for user health and safety.
• Avoid Static Content: If the movement is too subtle or certain frames stay the same for too long, the sticker might be rejected for 'not needing to be an animation.'
• Clean Transparencies: Ensure edges are clean and free of noise by using EzStampify's background removal tools.
For full details, please refer to the official documentation.
• Animation Sticker Guidelines: https://creator.line.me/en/guideline/animationsticker/